ATTENTION! High Voltage, that produces this device, is sufficient, that would kill a small animal. Be careful not to touch any wires when the device is on. Keep cats / dogs away.
The basic.
On the one hand, I already have a high-voltage converter, which is described here. On the other hand, I have Air Ionizer Head, which must be made to work.
The Air Ionizer Head is a very simple device, as you can see in the photo.
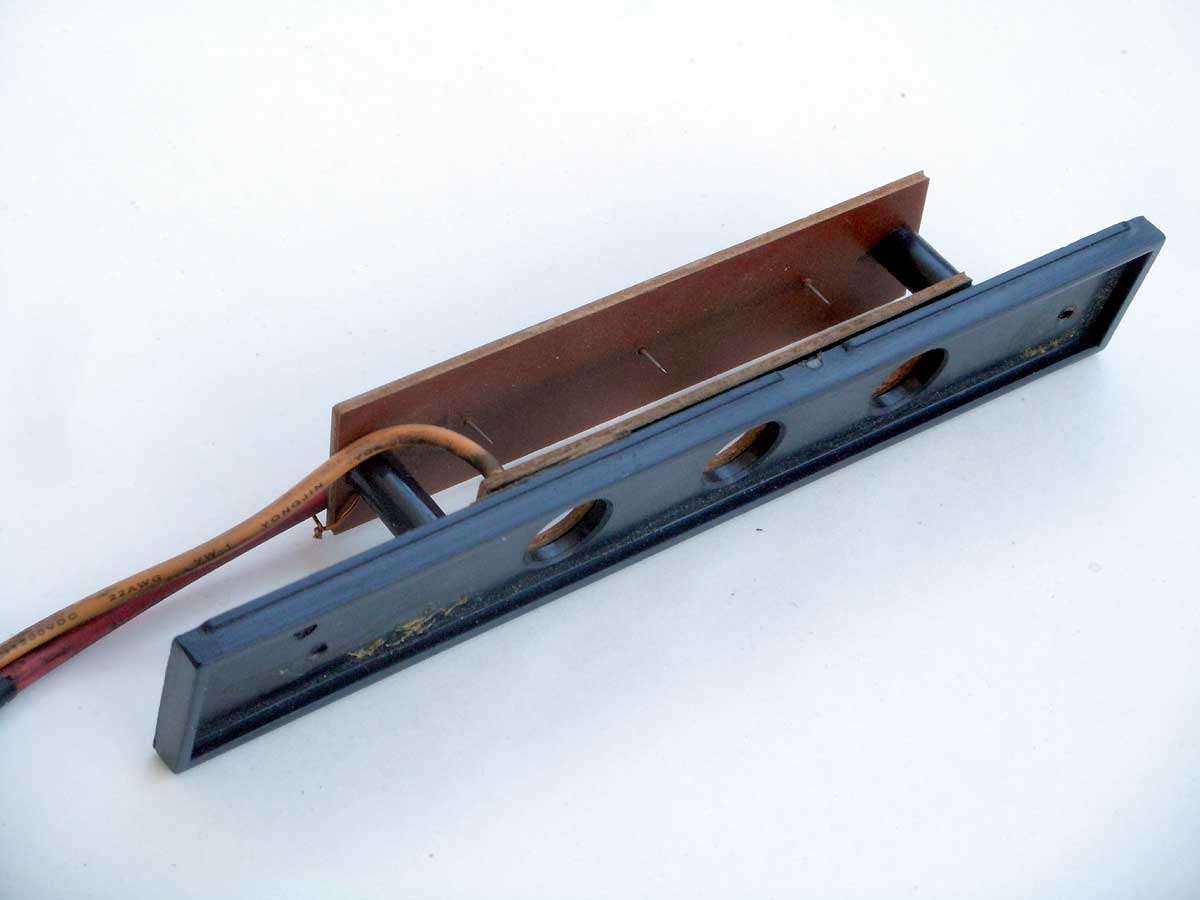
On back-plate easily visible has a three sharp needles, which are connected to a negative voltage source. On the front panel, you can see only three holes. Behind them there is another board where the same holes, with conductive material around (faced front). The latter are connected to a source of positive voltage (or Ground, that much safer). Do not be deceived by the color of wires - are reversed.
The required voltage.
Voltage necessary for operation of Air Ionizer is dependent on the geometrical dimensions (mainly on the distance between the electrodes). We will not speculate. Typically, these devices operate at a supply voltage of 2000V to 5000V (DC), with a very small current consumption.We already have a low power AC source up to 1500V. Very reasonable increase it by a simple voltage multiplier. At the same time we get a constant voltage (DC) which is necessary. *Good (not short) video that explains how the voltage multiplier works: EEVblog #469, Fundamentals.
The practical design is determined, mainly, by what parts do I have - diodes (1N40007) and capacitors (~1000pF) with a maximum voltage of 1000V. Temporary multiplier board on the right photo.

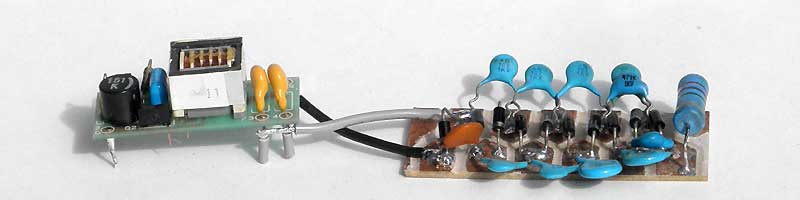
Now it is necessary to connect all together. What it looks like is seen in the photo at the top of the page. The circuit diagram is as follows.
Given that we do it for fun, then the 'ionizer head' will not be connected at this time. Instead, we connect two sharp needles, as shown in the diagram.
*Remember that the circuit produces enough power to kill a small animal. Be careful. Keep hands away.
The measurement.
What would we do when it comes to the high-voltage source? We want to know how we can get a spark! Long or short, but it should be. In fact, it is of practical importance. Given the lack of test equipment that can measure the high voltage with such low power, the spark gap is one of the simplest voltage meter.To break spark gap in air, the voltage must be about 1kV per millimeter distance between the needles (yellow line on the graph). For spherical electrodes this voltage will be higher (blue line). The rest - simple calculations.
The first experiment.
If all done correctly, the circuit should produce 5 kV. Therefore, the distance between needles is set to 5 millimeters.How spark looks in real life shown next. Distance between electrodes is about 6 mm.
You can make sparks endlessly, playing with voltage (Vin) and the distance between the needles. Only electric shock can stop you. And it will happen. Therefore, it is necessary to observe one simple rule:
A VERY IMPORTANT RULE :
When you're working with High Voltage, you must have a habit of keeping one hand in your pocket. This will save your life, and not one time.
Time to turn the experiment into practice. This circuit can produce up to 5 kV. Output is limited by diodes and capacitors that are used (for example, capacitors C5,6,8,10,12 connected in series, 5*1kV=5kV). Let's look at what the input voltage must be, to reaches the output voltage of 5 kV (5mm gap).
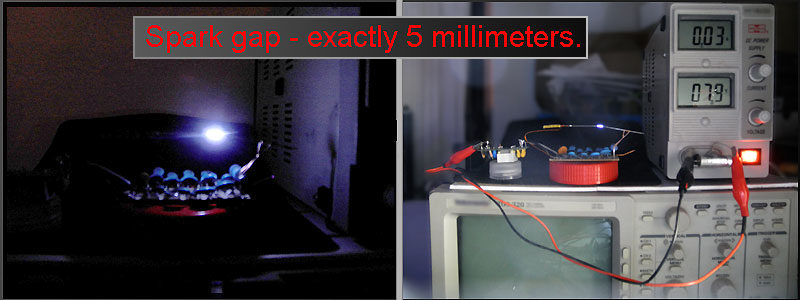
As result: at 8V (0.03A), we have a stable, 5mm, spark. Voltage is greater than 8 volts may destroy the voltage multiplier.
The next experiment.
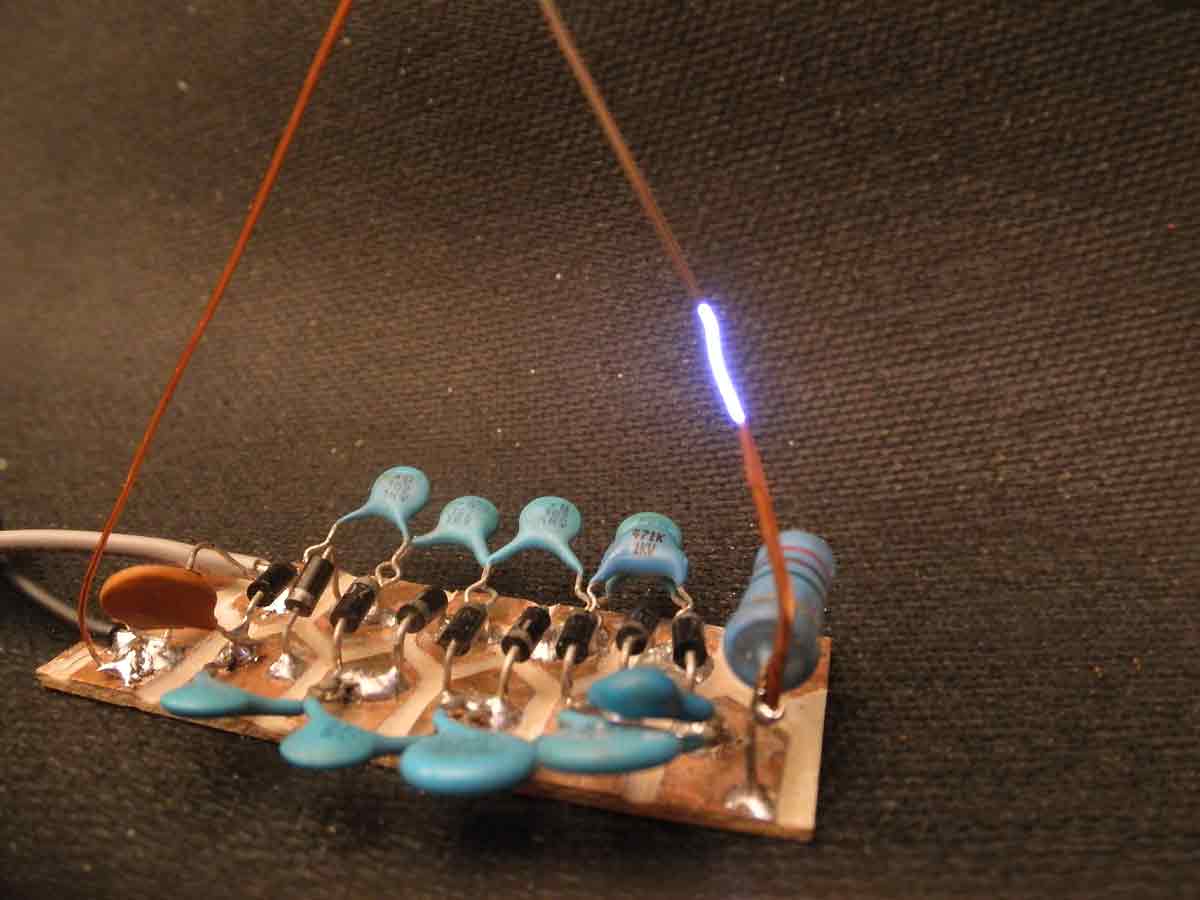
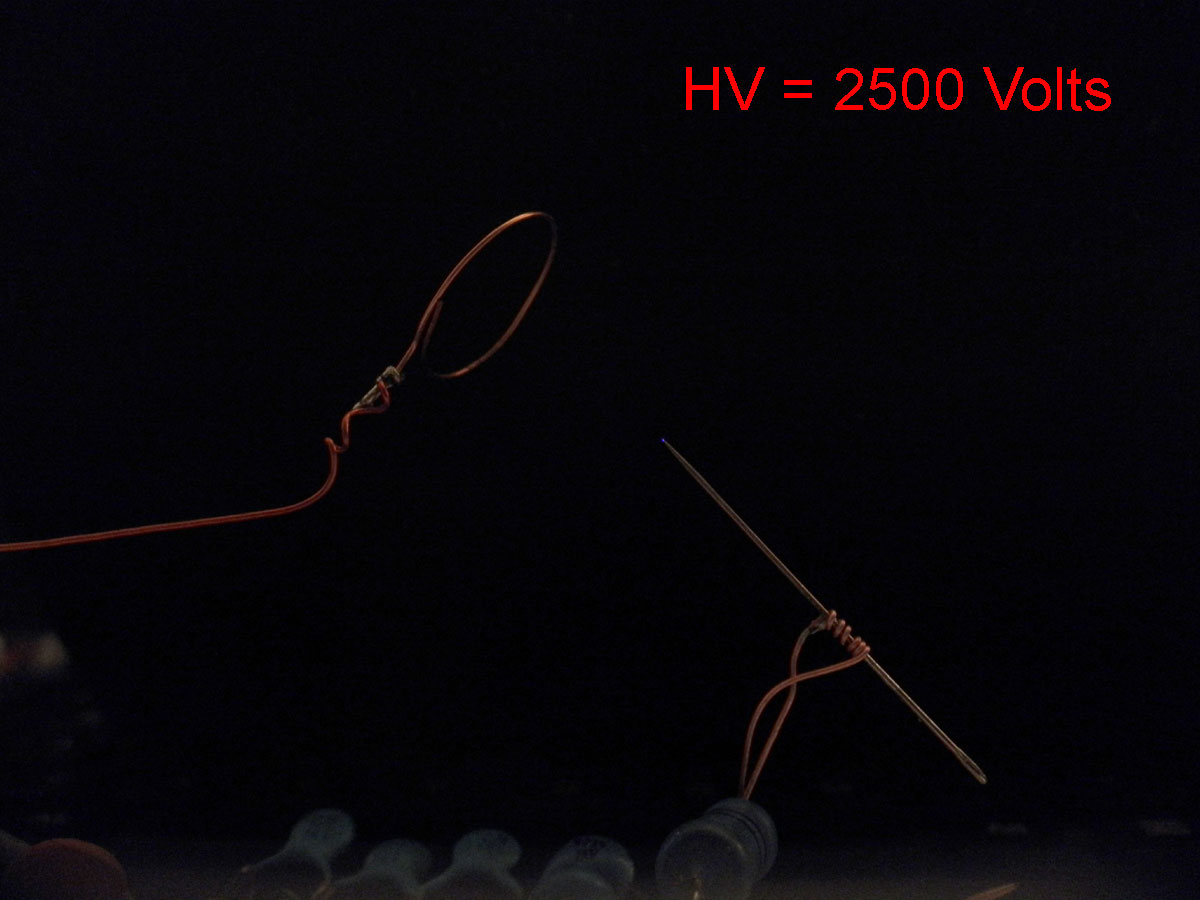
We can connect your Air Ionizer Head right now and it starts to work. But we'll do it later. In order to understand how it works, we add something that should work just as well. A ring of copper wire with a diameter of 10 - 20 mm and a thin needle will work the same way.
Attach the ring to the ground, and the needle to a high voltage (-) across the resistor 2.7 MOhms. Now it is safe and ready for the last experiment.
Slowly raise the voltage until a light blue glow appears at the end of the needle. In a dark room it is much easier to see. If this happens, then the ionizer started working properly.
On the photo, the voltage was raised up to 3 kV, only, for the fact that to the camera could catch the glow.
Actually, ionizer starts to work at a lower voltage. For what exactly? The chart below allows to approximately determine the necessary voltage at a known distance between electrodes.
The graph shows the voltage needed to create 1uA (0.000001A). It is not enough for a spark, but it is enough to ionize the air. So, at a distance of 10 mm voltage should be about 3700V.
Make sure that it works.
The glow around the tip of the needle is the easiest way to make sure that everything works. But it may be invisible or even been absent.
The second way, which everyone knows, is the appearance of a light, specific, smell. We generally believed that it is the smell of ozone. In fact, all components of air are ionized. We know only of ozone, because it has a memorable smell and has a long life time (up to 20 min.).
The third is the most interesting way. Few people know that this device makes a wind, as a small fan. Air moves from the needle (-) to the ring (+).
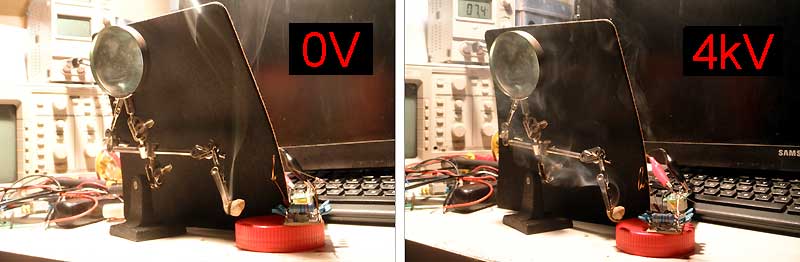
Of course, this does not make the air flow such as a hair dryer. Nevertheless, airflow is a very significant and easily felt by hand.
Almost ready for assembly.
The
... Not finished yet.
A sharp needle and a small metal ring 'easy' become an 'O3 generator'...